Showing posts with label Trash. Show all posts

Thursday, October 16, 2014

Take Me To Church... Literally.

Yes, yes! It's THAT weekend in the legendary Sleepy Hollow, when TWO local churches--Christ Episcopal Church in Tarrytown and Union Church of Pocantico--offer their best sales of the year.

Because quantum physicists have not yet developed an app that allows me simultaneously to be at both all weekend, I'm gonna give my suggestions for getting the most out of these excellent yet oh-so-different sales.

You'll soon recognize that this is not an unbiased review.

Christ Episcopal Church Fall Fair


Christ Church's Fall Fair promises a good time for the whole family. Plus, it makes that promise in both Spanish and English! Susan Copley, the rector, leads from the heart in all she and her church do.

See what I mean? Everyone is welcome.


At the Fall Fair, you will discover that open-hearted attitude in both word and deed. Deals abound--for clothing, housewares, toys, school supplies, bric-a-brac, collectibles, furniture, and much more.

Sleepy Hollow Tarrytown's photo.
Use this opportunity to explore the righteous deals in The Clothing Closet!
Sleepy Hollow Tarrytown's photo.
WHAT IS IN THAT TENT? I have to know.


If you're wavering over a price (not for games or food, mind), let them know--they're more likely than not to meet you halfway. The goal at Christ Church is to find new homes for these fine items, not to maximize profits and then kick the rest to the curb (ahem, see below). They have an excellent reputation for using their funds to help those most in need in Tarrytown and Sleepy Hollow.

BIG BONUS: The Fall Fair begins just before the festivities start for Tarrytown's Third Friday. I expect to stop by The Fall Fair a couple times this weekend, and I hope you do, too.

Union Church of Pocantico Hills


photo by Minna Irving for www.visitsleepyhollow.com


If you haven't been to Union Church yet, it's a good weekend to get a first impression. Union Church Fall Harvest Fair is famous for sneaking crazy finds into its masses of goods for sale. A couple years ago, I literally missed out on nabbing a genuine Channel handbag by mere inches. (INCHES.)

Give yourself more than an hour to move from tent to tent and room to room--each offers a different category. And the offerings are vast, I promise.

For those killer deals, show up early because keen eyes and quick fingers abound. If you miss the best of the best, you'll still find pretty darned good.

What you will not find, however, is anyone willing to bargain. I've seen too many smiling volunteers suddenly get tight-jawed when asked, "Could you lower the price on this?" Let me answer that one for you, Folks:

NO.

My suggestion is this: Buy it if you really want it and your finances allow. If you like taking chances or really cannot afford what they're asking, come back in the final two hours of the Fair, when everything is half off. Or, if you prefer to keep your cash in pocket, empty your vehicle and wait till the Fall Harvest Fair is over—They Curb LOADS of Furniture.

In any case, make time to visit the church's justly renowned windows, which were designed by Matisse and Chagall.

Union Church is now open for window viewing every day except Tuesdays.

Hours: 11 a.m. - 5 p.m. weekdays (closed Tuesdays)
10 a.m. - 5 p.m. on Saturday
2 p.m. - 5 p.m. on Sunday


Both sales start tomorrow, so hit the ATM or ready the checkbook now because just as in the Good Book itself, you can't get these heavenly deals on credit. 

Christ Episcopal Church
43 South Broadway
Tarrytown, NY 10591
FALL FAIR: Friday 4pm-8pm; Saturday 9am-4pm

Union Church of Pocantico Hills
555 Bedford Road
Pocantico Hills, NY 10591

FALL HARVEST FAIR  (Friday, Saturday 9 a.m. - 4 p.m; Sunday 12- 4 p.m.


Copyright 2014, Tanya Monier

Tuesday, March 25, 2014

The Right Way To Re-Gift!

Spring is sneaking its toe back into the icy pool of the Northeast. I'm seeing squirrels. I'm seeing robins. I'm seeing large numbers of snow shovels in the trash.
Ah, yes, the Badger is waking from her winter hibernation and finding that cruising the neighborhoods at night has value again.

Before Springtime Clean-Up gets too out-of-hand, however, I'd like to ask you Tarrytown/Sleepy Hollow folk to keep some items OUT of my grubby little paws.

Here's What:

1. Wheelchairs (and other items for the care of the elderly or injured)
2. New-With-Tag gift-type items (soaps, gift baskets, purses, glassware, etc)
3. Office Supplies (including working PCs)

Here's Why:
Picture


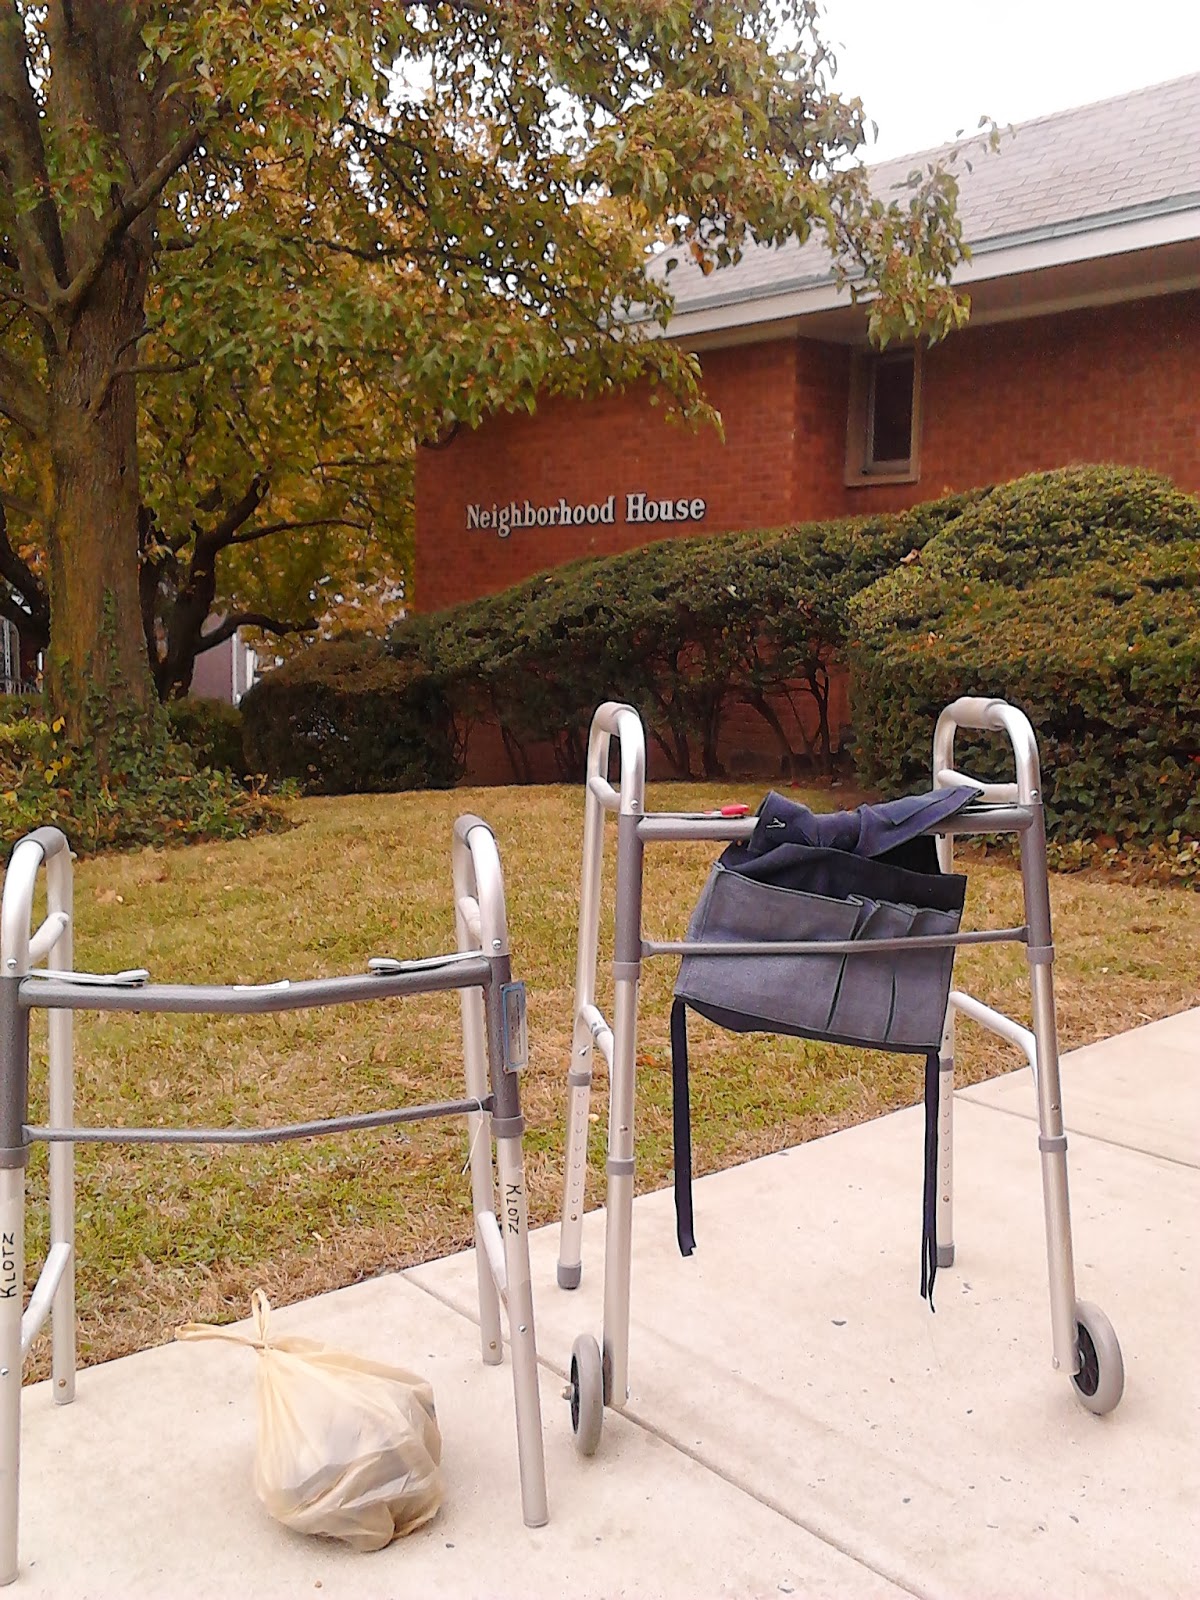
Tarrytown's own Neighborhood House needs these items.

If you don't know much about Neighborhood House, you're not alone. It quietly does its good work in this unassuming little building on the corner of Wildey and Washington Avenues.

The (mostly volunteer) staff offer locals seniors and students a comfortable place to engage in a number of activities, including Girl Scout meeting, SAT study sessions, exercise programs, and art classes. They even lend out crutches, walkers, and wheelchairs, a fact I learned firsthand in 2001, when I tore a ligament in my foot and Neighborhood House lent me a perfect pair of crutches.

After dropping off these walkers last fall (which I discuss more in "Give It Away NOW"), I asked Karla, a fixture at the front desk, what they need most at Neighborhood House. She listed the three categories above.

Karla put an emphasis on Neighborhood House's need for gift-type items. So, if you are feeling the Call of the Wild and want to dump those gifty things that have been languishing in your closet, drop them at Neighborhood House.

These items will be raffled off at their Springtime "Penny Social" (a term I know only because of the Little House on the Prairie novels of Laura Ingalls Wilder). Much-needed funds will be used to sustain their regular programs for seniors.

Now, is that the right way to re-gift or what?

Copyright 2014, Tanya Monier

Friday, February 28, 2014

DIY: Suitcase Endtable


Once upon a time, before the Northeast froze solid, I went to visit Mama Jennifer--aka "She-Who-Loans-Mod-Podge"--and I saw this child's chair next door, thrown out with a bunch of other stuff. Said "Other Stuff" ended up at The Cherry Door, but I was intrigued by the little stool. It joined the Outcast Party in my basement for many, many months.

One night, I tried to fix the stool myself. Immediately, I found the task undoable. I could not crack out the glue from pegs or holes that support the back piece. I'm not even sure the stuff was glue and not some kind of NASA-approved epoxy.

The pegs, too, were bizarre. Not one fit properly into both base and back, so the whole thing kept collapsing on itself.
Even The Man couldn't fix the chair's many problems. It was clearly homemade--and home-ruined--made by someone who understood how to make a stool, but not a chair.

So, the chair/stool languished, topless, in a corner.

Meanwhile, I was stumbling around and over a heck of a lot of vintage suitcases I kept after helping clear out the attic and basement of my friend who moved from her home of four decades. I was beginning to hate the basement--just piles of old stuff everywhere.

One day in November, Mama Jennifer, a Zen master of Pinterest (I kid you not--check out her boards) sent me some pins of suitcase end tables.

Ahhhh, a challenge that Victor Frankenstein would approve!

For This Project, You Will Need The Following:

A stool with a flat seat
A smallish suitcase. (IT MUST HAVE FLAT SIDES; otherwise, your drink will slide off onto the floor, and then you'll just have more to clean up.)
Pen or pencil
A hand drill
A screwdriver (that matches your screws)
4 metal washers
4 one-inch long wood screws

Since the stool acts as a solid base for the table, you won't need to cut out a piece of plywood to tuck inside the suitcase. I'll show you what that memorable process is like another day.

Step 1
Choose which side of the suitcase you want facing UP.

Place suitcase on stool, with the UP side facing UP. Center it: step back, take a look at it; if it looks good, it's centered enough. Hold tight to both pieces, and turn them over, so the stool is on top.

Step 2
Trace around the stool.

Remove stool. Make 4 X marks, evenly spaced, within the trace line. These Xs are where the screws will attach the stool and the suitcase to each other.

Step 3
Drill holes through (JUST THE) suitcase...at X points, please.

Do match your drill bit width to the width of the screw. You need to have pilot holes slightly smaller than the screws, otherwise the threads won't get a good bite on the wood.

Step 4
Place the suitcase--facing UP--on the stool again. (You're almost done, I swear)

Center the stool on the original trace lines from Step 2.

Drill pilot holes with the hand drill through the holes in the suitcase, into the stool. You'll want to go down about 1/2 inch, so you'll have an easier time twisting in the screws.

Step 5
Slide metal washers onto metal screws, then screw each into each hole.
 

Blow off the wood dust, clean up the suitcase and legs, and you're done!

I LOVE this end table, and I see that shoppers on Etsy, where I recently posted it, love it too. Now, if only one of them would buy it.


Or, do you want it? Look at that sweet smile... I can tell that it likes you!
 
Copyright 2014, Tanya Monier


Tuesday, February 25, 2014

Comics: The Decoupage Crisis

Mod Podge.

I'm cheap, so once upon a time, I tried to make my own Mod Podge, using a recipe I found at wikiHow.  It dripped, peeled when dry, and basically just stunk. Whatever makes the Podge superior, I am sold.
Why you shouldn't make your own Mod Podge
This blogger, who provides this pretty picture, clearly explains reasons why NOT to make your own Mod Podge.

So, when I got all nutty Sunday evening and started decoupaging a cigar box with the thrashed old comics that I could not sell to Undiscovered Realm, I had a bad feeling. The bottle was light, too light.

When did I even buy the bottle? I had no idea. What did I ever make with it? Not sure. I did have a visceral memory of peeling the stuff off my fingers like half-dried-snots, though, so I must have done someth--OH WAIT! I made Game Board Magnets. Whew! As my mama says, I was having a Senior Moment....

So, despite an obvious Mod Podge drought, I jumped in.

I have several comics decoupage projects in mind, some featuring big-haired women, some the flat-out awesome 1970s comic book ads ("BULLIED NO MORE!"). What seemed straightforward and easy, however, was to start my decoupage career by featuring a massive Milk Dud ad with The Joker as the lid of the cigar box.


 I HAD to wrap this 3-part ad around the outside, too. God, I love the late 70s...


"I TOO CAN BE SOCIALLY ACCEPTABLE! AND SO CAN ANYONE!"

Before I started slapping on the Podge willy-nilly, however, I cut out pieces from other comics to fit the side and interior panels. AND, I read "How to Decoupage a Box"...again, wikiHow. (Insert small pat on the back for educating self here.)

I wanted an ALL VILLAIN box, but in the end, what's better than opening the lid and finding Batman there, waiting to thwart all evil plans?

 
Admittedly, I am a snob. I assumed that I'd hate decoupage, but I love it as much as a kindergartner loves playing with glue and paper. It's rad.

I papered the interior with "newspaper stories" from The Daily Planet pages that I found tucked in several comics.


I podged the interior and side panels first. It looked awesome. I glued and glued and dreamed of Etsy shoppers fighting over it. Then, I ran out of the good stuff.

In a PANIC, I threw out a Facebook call-to-arms. To my genuine surprise, not every citizen of the Rivertowns leapt to my aid. Most made fun of me. Fair enough. But, until a mama friend called and offered me the tender mercy of a few ounces of Mod Podge, I felt like THIS:


I love this lady. I may use her in every post.

LOOK. The Joker's evil is being sealed in...forever.


And here IT IS.
HA HA HA HA HA!!
 
I love it.
In fact, I couldn't resist taking a few electrical outlet covers off the wall and decoupaging them during Downton Abbey.


Thanks for doing unto the Crafter as you would have done unto you, Mama Jennifer. I owe you....
 
Copyright 2014, Tanya Monier


Thursday, December 5, 2013

Where To Take The Excess, pt. 4: C & W Vacuum Repair Service

As I muddled my way through neighborhoods this fall, I noticed something undeniable: Folks throw away a lot of cleaning tools. Swiffers. Brooms, Mops. (Doesn't anyone play stickball with broom and mop handles anymore?) Cleaning pails. Vacuums. Oh, so many vacuums....

One evening, I saw four curbed vacuums on just one street, then came home to see my own tenant had put his one-month-old vacuum in the trash, too.

You may be thinking, "So what? Why not just buy a new Hoover for $100?" Other than the fact that their motors are so earsplitting that children, pets, and partners flee when you turn on a Hoover, it breaks! The brands I see curbed most often are Hoover and Dirt Devil. Humph. It's like the dead dictator of the FBI and Satan himself hold stock in landfill.

Who can help slow down this, ahem, sucky trend in trash? Wade, that's who!

Meet Wade!
On Tarrytown's bustling Main Street, C&W Vacuum Repair Service is easy to miss. I passed it hundreds of times before I found a need to stop in. Once I did, however, I made reasons to go back. Here's why:


1. Price: Wade informs me that the average repair job at C&W is between $50-75. That said, I have never paid more than $30 to have him clean and repair my vacuum, a 2003 Panasonic upright--which is ancient in vacuum years, and frequently clogged with the shed of my three longhairs (none of whom are pets).

2. Speed: Wade works quickly, so I can get back to doing what I love: cleaning house. (Excuse me for a minute while I go pour myself a shot of cooking sherry and weep...)

3. Variety: Do you see vacuums in the front window? No! That's because Wade is a man of many talents. He sharpens knives to a murderous edge, repairs and sells vacuums and vacuum parts, and also lamps,

 Buy the Rooster; then send me a photo of it in your home.


radios,


turntables,


and clocks.


and maybe those toys; I didn't ask.


And his use of wall storage in this small store would make Ikea proud. When you go in, just look around--and up!
 You are not imagining things: that IS a bullwhip.


I gave Wade my tenant's new-but-busted Dirt Devil, and picked up lamp harps to finish my Night Of A Thousand Lamps project.
 Win-Win, I say.


So, keep it local, River Towners, and if you just cannot bear the thought of repairing your vacuum, turntable, or lamp, DON'T DUMP IT. Give it to Wade. He's got Hustle. And I mean that as a compliment.


Copyright 2013, Tanya Monier

Thursday, November 21, 2013

We're Playing With Broken Glass!

My husband--the Mountain Man, The Prince of the Forest--is the best ally this Happy Badger could desire.

That's my thesis. Here's some proof.

One hot June night, an apartment building that I pass by on my way to a local grocery store had this unusual, broke-down chair on the trash pile. At a glance, I could see that it was older than my octogenarian father.

I had to have it. But I didn't want to fix it to be a chair again.

I tore the thing to pieces that night, only keeping the chair back intact.

Then, I put the Mountain Man to work. Out came his favorite saw horses, which we found in the basement when we bought the place 13 years ago. He tidily sawed the legs off so that only the back above the seat line remained.

My goal: make this old chair back into a mirror and jewelry rack. Can you see what I saw in it?


Months passed. I looked up mirror-cutting on wikiHow, then I debated with myself. Should I pay Jimmy Donovan, our fine local glass cutter to cut two smaller mirrors out of a cracked wardrobe mirror I found in Pleasantville? (gosh, I just love Pleasantville's trash....) Should I take a shot at cutting a mirror by myself? More to the point, could I somehow convince The Man to do it for me?

Turns out the cliche is true: You just don't know until you ask. He was totally game.

First, we had to free the mirror from the frame. Usually, I grouse about non-trash "Trash" that I see weekly, but the people who threw this mirror out deserve praise. They had done multiple repairs before giving up, leaving eras of hot glue to cut through. I was glad I needed to salvage only two 12" x 5" pieces from this long mirror because I broke it in two more spots before I managed to pull off the last piece of framing.

I did, in fact, use the carbide steel glass cutter, just like the pros use, only I did it badly. My fantasies of making a stained-glass window are officially on hold.
Steel Wheel, Traditional Cast, Straight End Glass Cutter
I busted up still more usable mirror until I got one decent piece. Then, I handed the task over to The Man.
Even with my husband's strong and steady hand, we made one serious mistake. (Don't worry--it doesn't involve blood or releasing my fingernails from their fleshy moorings.) We used a square dowel instead of a round one to crack off the scored pieces. Ugh. No kidding, don't make the same mistake. Turns out that square dowels under the glass make lots of curved, triangularish shards on the scored edge.

Finally, we had two mirrors of the right size, more or less, but horribly jagged. The chair back offered no grooves to hide these edges.

Just as despair was setting in, The Man proved his noble, princely nature again by pulling out an electrical grinder and an extension cord and confidently declaring, "Let's take this project outside!"

As I directed a steady stream of water on the edge of the whirring grinder, I asked, "Isn't this how people die of electrocution?"

 
My Man laughed like the experimenting kid he used to be: "No. We're grounded anyway. C'mon, how can you not have fun? We're playing with broken glass!"
 
Wordsworth said it best: "The Child is father of the Man."
 
And, to my enormous relief, the grinding sort of worked. With the help of our handy hot-glue gun, we attached the pieces to the chair back/mirror frame. The goo disguises the rough edges pretty well.
 
Next time, I'll probably leave this work to the pros, like Jimmy Donovan,
but I'm really proud of our teamwork.
 
The Final Touches!
 
I added five brass screw-in hooks that I picked up when Christ Church cast off a bunch of stuff from their basement, plus two brass knobs that I claimed from an otherwise unredeemable curbed dresser in Sleepy Hollow village.


And then, since he's your ally, too, the Prince performed another good deed. He talked me out of painting the frame hot pink.
 
Bedhead and Jammies: the only way to Craft...


Copyright 2013, Tanya Monier