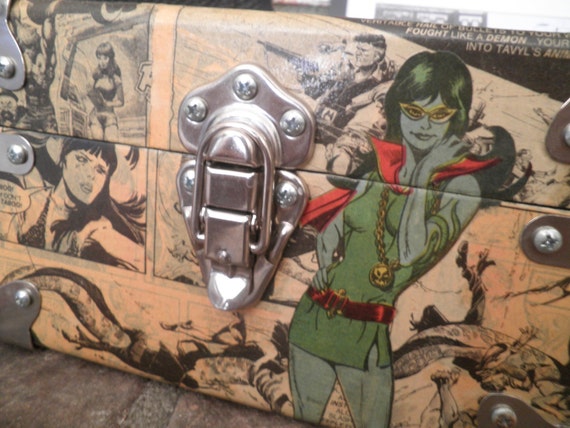
Once upon a time, before the Northeast froze solid, I went to visit Mama Jennifer--aka "She-Who-Loans-Mod-Podge"--and I saw this child's chair next door, thrown out with a bunch of other stuff. Said "Other Stuff" ended up at The Cherry Door, but I was intrigued by the little stool. It joined the Outcast Party in my basement for many, many months.
One night, I tried to fix the stool myself. Immediately, I found the task undoable. I could not crack out the glue from pegs or holes that support the back piece. I'm not even sure the stuff was glue and not some kind of NASA-approved epoxy.
The pegs, too, were bizarre. Not one fit properly into both base and back, so the whole thing kept collapsing on itself.
Even The Man couldn't fix the chair's many problems. It was clearly homemade--and home-ruined--made by someone who understood how to make a stool, but not a chair.
So, the chair/stool languished, topless, in a corner.
Meanwhile, I was stumbling around and over a heck of a lot of vintage suitcases I kept after helping clear out the attic and basement of my friend who moved from her home of four decades. I was beginning to hate the basement--just piles of old stuff everywhere.
One day in November, Mama Jennifer, a Zen master of Pinterest (I kid you not--check out her boards) sent me some pins of suitcase end tables.
Ahhhh, a challenge that Victor Frankenstein would approve!
For This Project, You Will Need The Following:
A stool with a flat seat
A smallish suitcase. (IT MUST HAVE FLAT SIDES; otherwise, your drink will slide off onto the floor, and then you'll just have more to clean up.)
Pen or pencil
A hand drill
A screwdriver (that matches your screws)
4 metal washers
4 one-inch long wood screws
Since the stool acts as a solid base for the table, you won't need to cut out a piece of plywood to tuck inside the suitcase. I'll show you what that memorable process is like another day.
Step 1
Choose which side of the suitcase you want facing UP.
Place suitcase on stool, with the UP side facing UP. Center it: step back, take a look at it; if it looks good, it's centered enough. Hold tight to both pieces, and turn them over, so the stool is on top.
Step 2
Trace around the stool.
Remove stool. Make 4 X marks, evenly spaced, within the trace line. These Xs are where the screws will attach the stool and the suitcase to each other.
Step 3
Drill holes through (JUST THE) suitcase...at X points, please.
Do match your drill bit width to the width of the screw. You need to have pilot holes slightly smaller than the screws, otherwise the threads won't get a good bite on the wood.
Step 4
Place the suitcase--facing UP--on the stool again. (You're almost done, I swear)
Center the stool on the original trace lines from Step 2.
Drill pilot holes with the hand drill through the holes in the suitcase, into the stool. You'll want to go down about 1/2 inch, so you'll have an easier time twisting in the screws.
Step 5
Slide metal washers onto metal screws, then screw each into each hole.

Blow off the wood dust, clean up the suitcase and legs, and you're done!
I LOVE this end table, and I see that shoppers on Etsy, where I recently posted it, love it too. Now, if only one of them would buy it.

Or, do you want it? Look at that sweet smile... I can tell that it likes you!
Copyright 2014, Tanya Monier


